
Edge installation
On this page you will find information about the installation of your Edge.
What is Aire Edge?
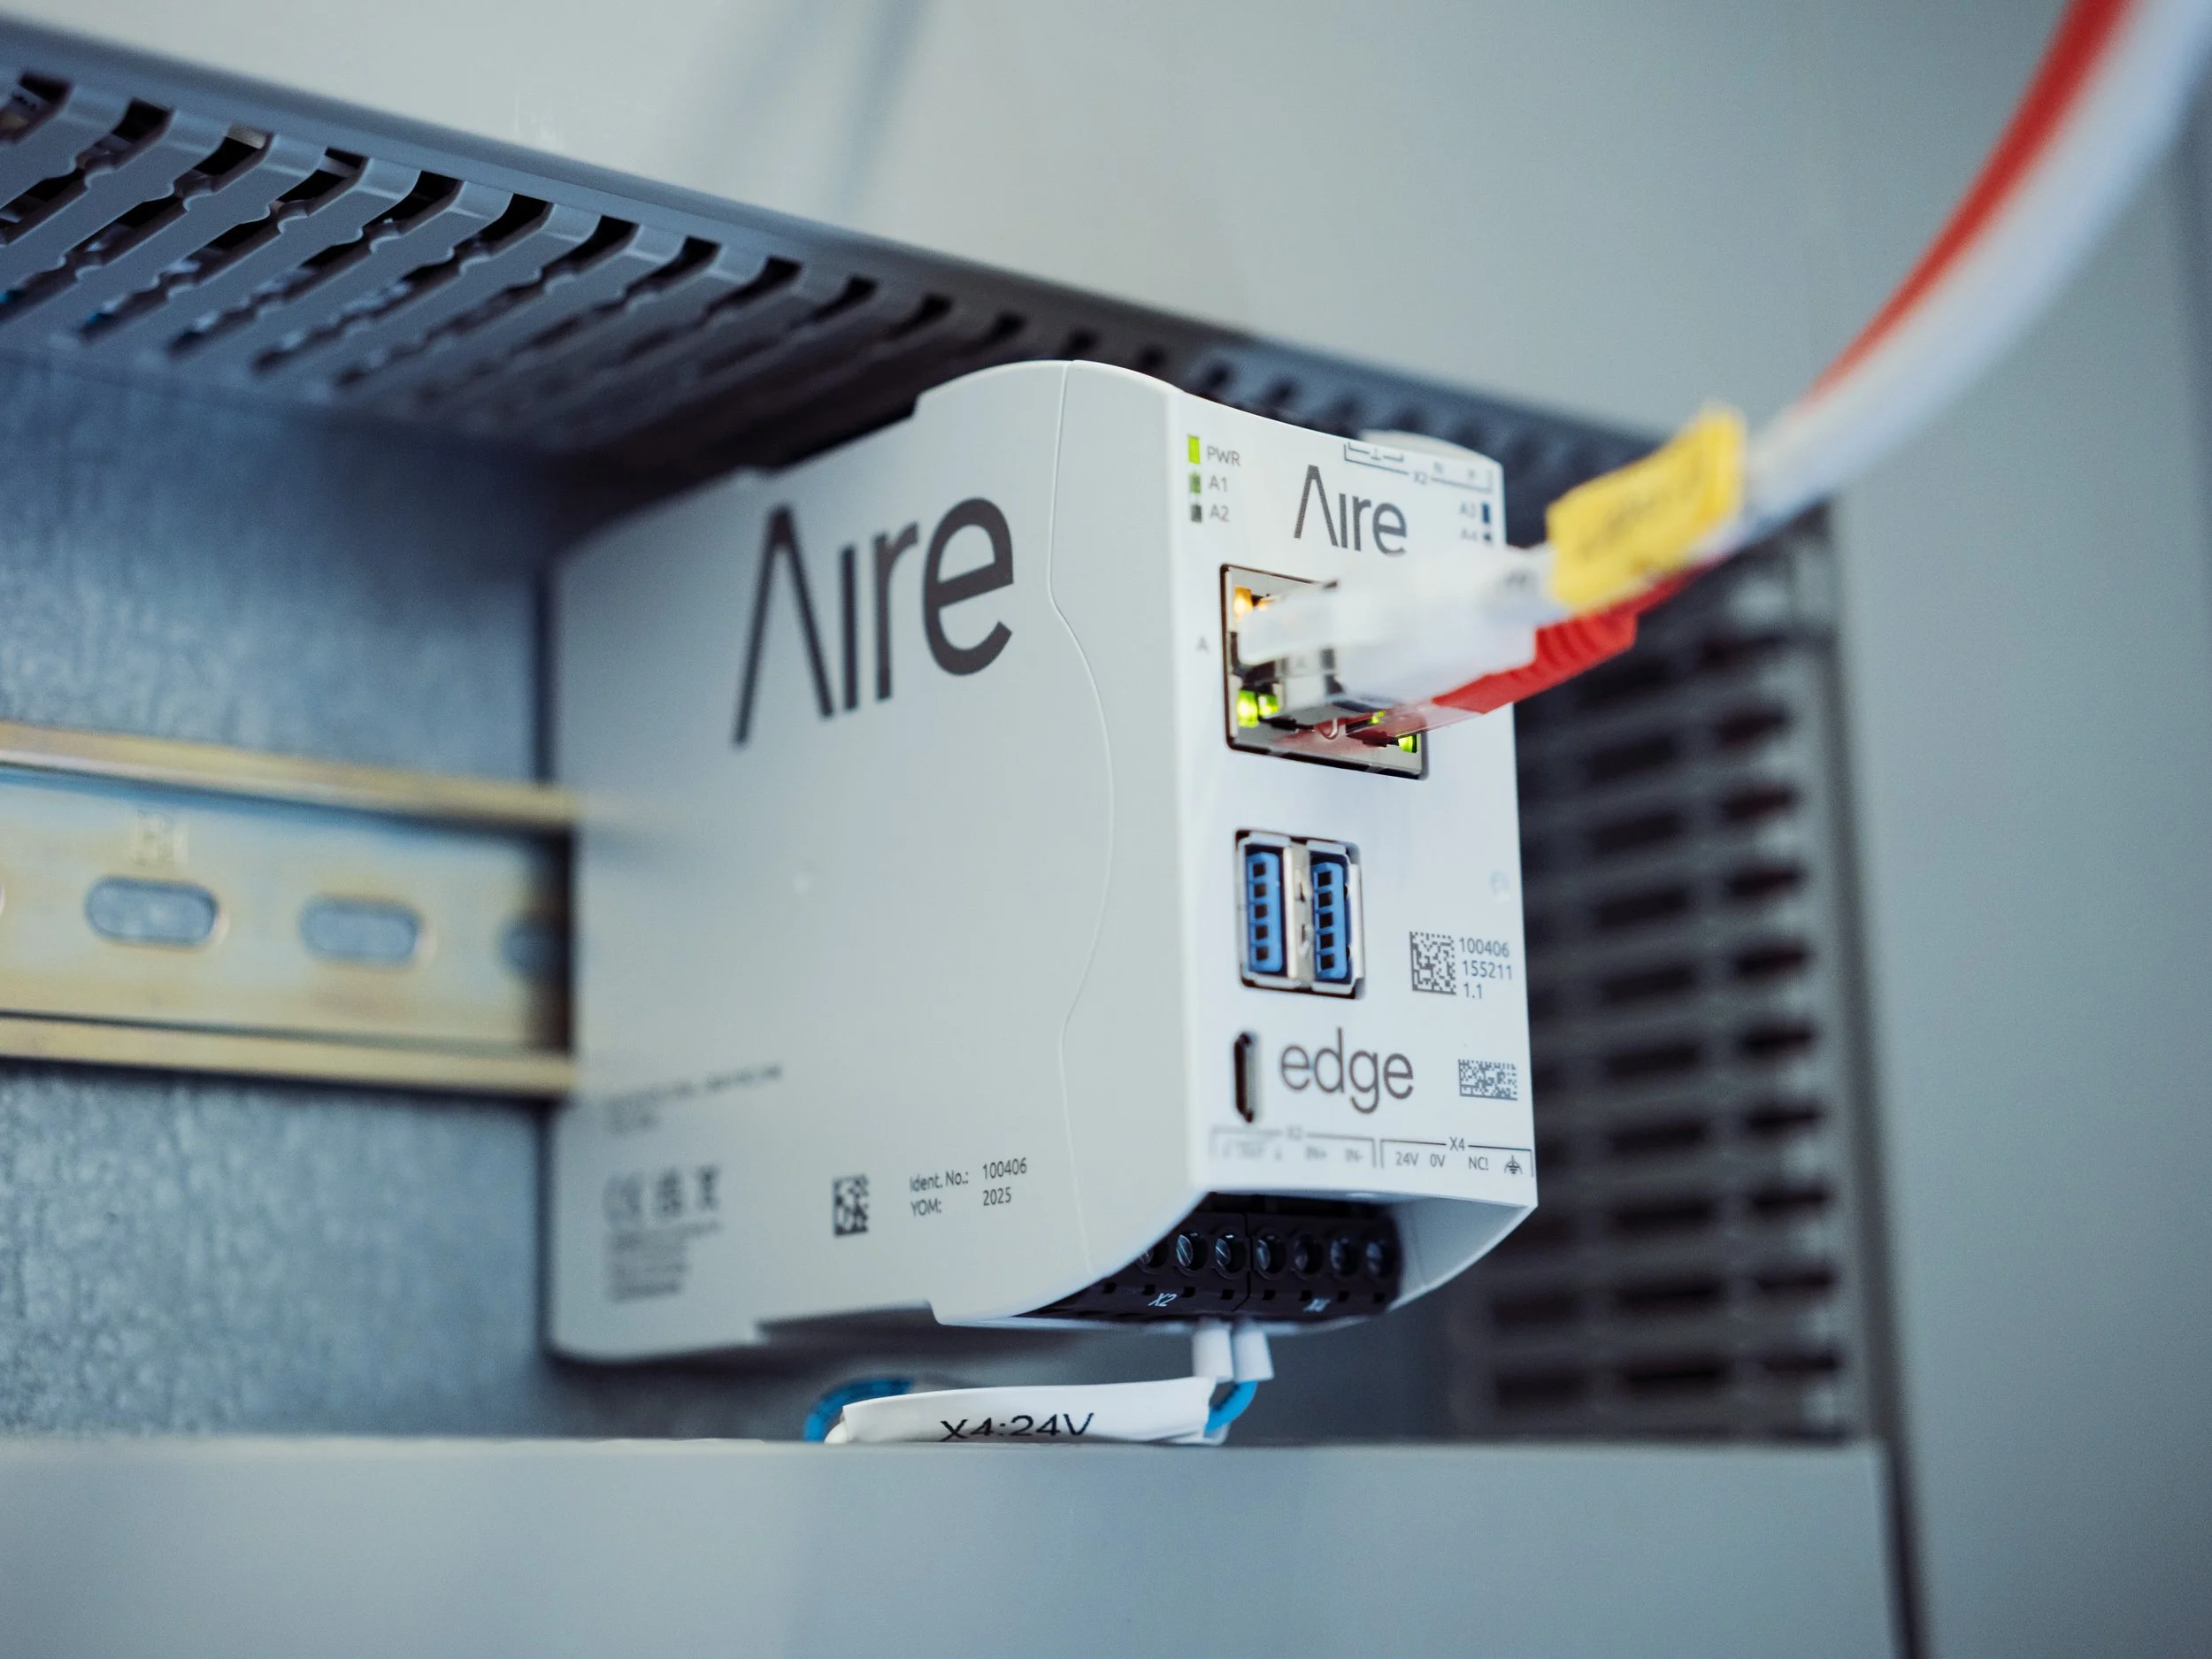
Aire Edge is a computer that collects measurement data and controls various types of energy resources, such as batteries.

Installation for standard setups
Complete the following steps:
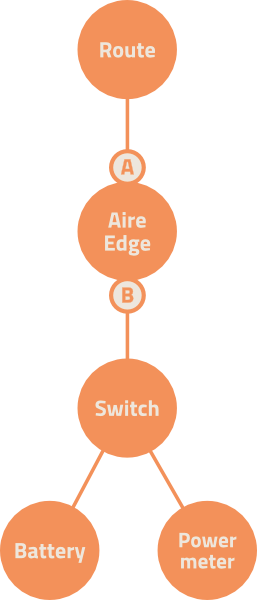
1. Connect Port A to the internet.
2. Connect Port B to the switch.
3. Connect the meter and battery to the switch.
4. Change the IP-addresses of both the battery and the meter.
5. Connect the power.
(Contact your meter or battery supplier for instructions
on how to change the IP-address.)
IP Settings
Static IP:
192.168.6.2 - Meter for total site power
192.168.6.3 - Meter for Battery
192.168.6.4 - Battery
192.168.6.5-99 - Used for extra resources
Network Configuration
Aire Edge establishes a subnet with the following configuration:
DHCP: 192.168.6.100-192.168.6.250
Gateway: 192.168.6.1
Netmask: 255.255.255.0
FAQ
-
Check that Aire Edge is powered on and connected to the internet, and that all network cables are connected correctly.
Once the installation is complete, contact Aire according to the instructions below. Aire will verify the connection to the Edge and confirm that communication with the site’s resources and meters is working correctly.
Leave the site powered on and the Edge connected to the internet after installation.
-
Connect the resources according to the installation documentation for the relevant site. Aire Edge can communicate with multiple resources at the same site.
It is important that each resource has the correct network connection and uses the IP addresses and network settings specified for the installation.
If you are unsure which IP address, port or network connection a particular resource should use, contact Aire before changing any network settings.
-
Configuration may be required when the Edge is started for the first time. Always contact Aire Support during the initial start-up.
If the Edge has already been configured, first check that the internet connection works without the Edge connected and that the network cables are connected to the correct ports.
If the problem persists, contact Aire and provide the name of the site and details of the connected devices.
-
No. However, Aire needs to carry out certain configuration steps to ensure that the network and resource control function correctly. Always contact Aire Support during the initial start-up.
-
Check that the Edge is powered on and connected to the internet according to the installation documentation.
Aire can remotely verify that the Edge is online and communicating correctly. Contact Aire once the installation is complete for final verification.
-
Check that the resource is powered on and operating normally, and that the network cable is connected correctly.
Also check that the connection complies with the installation documentation. Do not deviate from the installation guide without first consulting Aire.
Contact Aire if communication still does not work.
-
Check whether the IP address can be changed to another static address and follow the installation guide.
Document the IP address you find and contact Aire.
-
Contact Aire for verification before leaving the site. We will check that the Edge is online and that we can read data from and communicate with the relevant resources and meters.
Once Aire has confirmed that communication is working correctly, the installation can be considered complete.
-
Please have the following information available:
Site/facility name
The Edge unit that has been installed (MAC address of Ethernet port A)
The connected resources and meters
Any IP addresses that differ from the installation documentation
Photos of the installation and connections
A brief description of any problems or error messages
-
Check the supply voltage and fuse, and ensure that the power supply is connected correctly according to the installation documentation.
If the Edge still does not start, contact Aire before replacing any equipment or making other changes.
Please note that Aire Edge requires a 24 V DC power supply.
Technical data
| Housing dimensions (H x W x D) | 96 x 45 x 110,5 mm |
| Housing type | DIN rail housing (for DIN rail version EN 50022) |
| Housing material | Polycarbonate |
| Weight | approx. 197 g / 224 g (incl. connectors) |
| Protection class | IP20 |
| Power supply | 10.8 ... 28.8 V DC1 |
| Max. power consumption | 20 W (incl. 2 x 900 mA USB load)2 |
| Allowable operating temperature | -25 ... +55°C |
| Allowable storage temperature | -40 ... +85°C |
| Max. relative humidity (at 40 °C) | up to 93% (non-condensing) |
| Connectors | 1 x 4-pole screw-type terminal for RS485 1 x 4-pole screw-type terminal for relay contact and signal input 1 x 4-pole screw-type terminal for power supply |
| Conformity | CE, UKCA |
1 The bridging time required by EN 61131-2 of voltage dips of at least 10 ms and the max. USB output current are only guaranteed with a supply voltage 24 V -15% / +20%.
2 The average power consumption without USB load varies greatly and depends on the use of the interfaces, the GPU and the CPU. It is usually well below 4 watts without HDMI.